A Chamberlain garage door opener can make everyday life easier by opening and closing your garage door with a remote, wall control, or compatible smartphone app. You no longer need to lift a heavy garage door manually each time you leave your home or return from work.
Chamberlain offers different garage door opener systems, including belt-drive, chain-drive, and wall-mounted models. Some models include Wi-Fi connectivity, battery backup, built-in cameras, motion-activated lighting, and myQ technology.
However, buying the right opener is only the beginning. Proper installation, remote programming, sensor alignment, and regular maintenance are important for reliable and safe operation.
This guide explains how to choose a Chamberlain garage door opener, understand its features, install it, program a remote or keypad, connect myQ, troubleshoot common problems, and keep the system working smoothly.
What Is a Chamberlain Garage Door Opener?
A Chamberlain garage door opener is an electric motorized device that operates a compatible residential garage door. Most systems use a motor, rail or drive mechanism, trolley or other lifting connection, and electronic controls to move the door.
The garage door itself is supported by springs that counterbalance its weight. The opener does not replace those springs.
A typical Chamberlain system includes:
- Motor unit and drive mechanism
- Garage door opener remote control
- Wall-mounted control button
- Safety reversing sensors
- Emergency release mechanism
- Rail and mounting hardware, where applicable
- Optional wireless keypad or smart features
Chamberlain also offers connected products that work with its myQ system, allowing compatible garage doors to be monitored and controlled through a smartphone.
Different models include different accessories. Always check the product box, model number, and owner’s manual before installation.
Types of Chamberlain Garage Door Openers
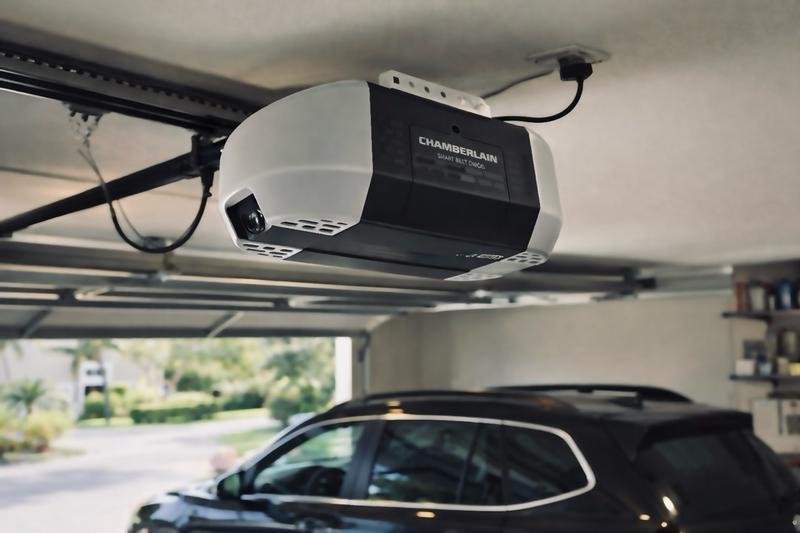
Choosing the correct system depends on your garage design, noise preferences, available installation space, and desired features.
1. Chamberlain Belt Drive Garage Door Opener
A Chamberlain belt-drive garage door opener uses a reinforced belt to move the trolley that opens and closes the garage door.
Belt-drive models are popular because they generally produce less operating noise and vibration than traditional chain-drive systems.
Main advantages:
- Quieter operation
- Smooth door movement
- Suitable for attached garages
- Many smart-enabled options
- Relatively low drive-system maintenance
A belt-drive opener is often a good choice when a bedroom or living room is located above or beside the garage.
Remember that noisy rollers, loose hardware, or an unbalanced garage door can still create sound even with a quiet motor.
2. Chamberlain Chain Drive Garage Door Opener
A chain-drive opener moves the trolley using a metal chain. It is a traditional design used in many residential garages.
Chain-drive systems are commonly chosen for their durability and straightforward mechanical design.
Main advantages:
- Often less expensive than comparable belt-drive systems
- Familiar, widely used technology
- Suitable for many standard residential doors
- Replacement parts available for supported models
One disadvantage is noise. Metal chain movement can create more vibration than a belt-driven mechanism.
If the garage is detached from your home, the extra noise may not matter as much.
3. Chamberlain Wall Mount Garage Door Opener
A wall-mounted opener, sometimes called a jackshaft opener, attaches beside the garage door rather than hanging in the middle of the ceiling.
It typically operates through a compatible torsion-bar system.
This design is useful when homeowners want extra overhead space for storage or other garage equipment.
However, wall-mounted openers are not compatible with every garage door. The required shaft arrangement, clearances, door balance, and model-specific safety accessories must be checked before purchase.
Comparison of Chamberlain garage door opener types
| Feature | Belt drive | Chain drive | Wall mount |
|---|---|---|---|
| Noise | Generally quiet | Generally louder | Generally quiet |
| Typical location | Ceiling | Ceiling | Beside door |
| Overhead clearance | Rail required | Rail required | Frees central ceiling |
| Typical relative cost | Medium to high | Lower to medium | Higher |
| Best for | Attached garages | Budget-conscious buyers | Suitable garages needing ceiling space |
| Compatibility | Many sectional doors | Many sectional doors | Specific torsion-bar configurations |
Buying tip: Do not select a motor based only on horsepower. Door weight, balance, dimensions, track configuration, manufacturer requirements, and motor-drive technology all matter.
Key Features of a Chamberlain Garage Door Opener
Modern Chamberlain systems offer more than basic remote operation.
myQ smart garage control
A compatible Chamberlain myQ garage door opener allows users to monitor the door and control supported functions using the myQ app.
Depending on the device, account, region, and current service availability, features may include door-status notifications, remote opening and closing, and access management.
Battery backup
Some Chamberlain openers include battery backup, allowing limited operation during an electrical outage.
The number of available cycles depends on the battery condition, opener model, and other operating conditions.
Safety reversing sensors
The safety sensors create an invisible beam across the garage doorway near the floor. If an obstruction breaks the beam while the door is closing, the opener should prevent or reverse closing as designed.
Security technology
Compatible Chamberlain remotes use supported coded communication systems to reduce the risk of unauthorized operation.
However, you should still protect remotes, keypad PINs, smartphone accounts, and physical access to the garage.
LED lighting and cameras
Some Chamberlain models offer bright integrated LED lighting, motion-sensing controls, and cameras.
These features can be helpful when entering a dark garage or checking the space remotely.
Chamberlain’s current product pages explain the available equipment and model differences.
How to Install a Chamberlain Garage Door Opener: Step-by-Step Guide?
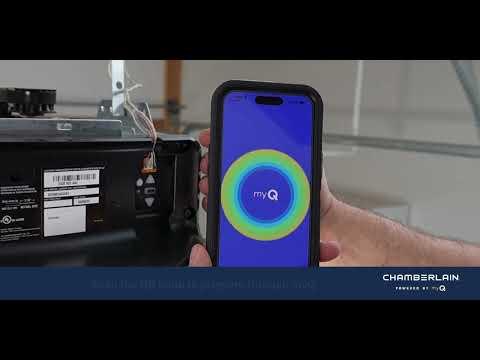
Installing a Chamberlain garage door opener requires careful preparation, the correct tools, and strict attention to safety.
Chamberlain provides installation manuals and videos for different models. According to its installation guidance, the process generally takes at least two hours, depending on the product and the installer’s experience. Some steps require two people.
Important: These instructions provide a general overview for compatible ceiling-mounted openers. They do not replace the instructions for your exact model. Never loosen or adjust garage door springs, torsion shafts, cables, bottom brackets, or other components under tension. Hire a qualified garage door technician if the door is damaged, unbalanced, or difficult to operate.
Step 1: Gather the necessary tools
Before installing your new opener, prepare the equipment.
Common tools include:
- Power drill and appropriate drill bits
- Screwdrivers
- Adjustable wrench and socket set
- Tape measure
- Spirit level
- Pliers and wire cutters
- Stable ladder
- Safety glasses
- Manufacturer-approved mounting hardware
Check the product manual to confirm whether additional tools or structural supports are required.
Step 2: Inspect the garage door
Before installing the motor, verify that your garage door operates properly.
With the door fully closed, follow the manufacturer’s emergency-release instructions to disconnect the existing opener, if applicable.
Carefully lift the door manually using its designated handle.
A properly balanced garage door should move smoothly without binding or requiring excessive force.
If the door feels unusually heavy, drops unexpectedly, has damaged cables, or appears uneven, stop immediately.
A garage door opener should never be used to compensate for defective springs or other mechanical problems.
Step 3: Assemble the rail and drive system
For ceiling-mounted models, the rail connects the motor unit to the door.
Follow the specific assembly diagram supplied by Chamberlain.
Depending on your model, this process may involve joining rail sections, connecting the trolley, attaching the belt or chain, and setting the initial tension.
Do not overtighten the belt or chain. The correct tension varies by model.
Step 4: Mount the header bracket
The header bracket supports the front of the opener rail.
Locate the correct structural mounting point above the garage door.
Use the measurements, reinforcement requirements, and approved fasteners described in your model’s instructions.
Do not attach the header bracket only to drywall or weak trim.
Step 5: Install the motor unit
Raise the motor assembly into the correct position.
Use suitable structural supports and fasteners to secure it to the garage ceiling.
Ask another adult to assist if necessary.
Check the rail position and motor clearance before tightening the mounting hardware.
Step 6: Connect the door arm
Attach the garage door arm and trolley connection according to the manufacturer’s instructions.
The connection allows the opener to move the door through its normal travel.
Some doors require reinforcement brackets. Using an unsuitable connection can damage the door panel.
Step 7: Install the safety reversing sensors
Safety reversing sensors are essential components of a modern garage door opener.
Install the sensors on opposite sides of the garage opening at the height specified in the product manual, generally no higher than 6 inches above the floor.
The sensors must face each other with a clear path between them.
Secure the cables, connect the wiring exactly as instructed, and check that both sensors have the correct indicator lights.
Never bypass or disconnect safety sensors to make the opener close.
Step 8: Connect power and wall controls
Install the wall-mounted control at the height and location specified by Chamberlain, away from moving door components and out of children’s reach.
Route and connect the low-voltage control wiring as instructed.
Connect the opener to an appropriate grounded electrical outlet.
Never modify the power cord, remove the grounding connection, or use unsuitable electrical wiring.
If a new electrical outlet is required, hire a qualified electrician.
Step 9: Set the door travel limits
Travel limits tell the opener where the garage door should stop when fully open and fully closed.
On many Chamberlain models, adjustment buttons on the motor unit are used during the programming process.
Other models have different controls.
Follow the manual for your specific opener to set the opening and closing positions.
Incorrect settings may prevent the door from closing completely or cause the safety reversing system to operate incorrectly.
Step 10: Test the safety reversal system
After completing installation, test the safety system before using the garage door normally.
For models requiring the standard obstruction test:
- Open the garage door fully.
- Place a 1½-inch-high object, such as a standard 2×4 board laid flat, in the center of the doorway.
- Use the wall control to close the door while keeping everyone away.
- Confirm that the door reverses after contacting the object.
- Remove the object and perform the additional tests required by your manual.
If the door fails the test, stop using the automatic opener until it has been corrected.
Chamberlain recommends regular safety testing and provides specific instructions for its reversal system. support.
How to Program a Chamberlain Garage Door Opener Remote?
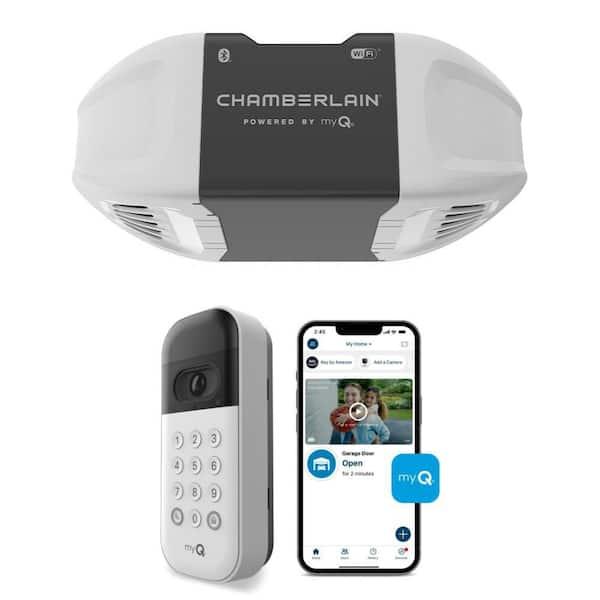
A Chamberlain garage door opener remote allows you to operate the garage door without using the wall control.
If you purchase a replacement remote or need to connect an additional remote, you may have to program it.
Step 1: Identify your remote and opener
Check the model number on the opener and the replacement remote.
Not every Chamberlain remote works with every opener.
The color of the Learn button can help identify the opener’s radio-control system, but compatibility must be verified using the manufacturer’s compatibility chart.
Step 2: Find the Learn button
On many models, the Learn button is located on the motor unit, sometimes behind the light cover or near the antenna wire.
The button may be yellow, purple, red/orange, green, or another color, depending on the model.
Step 3: Activate programming mode
For many compatible openers:
- Press and release the Learn button.
- Wait for the indicator light to show that programming mode is active.
- Within approximately 30 seconds, press and hold the desired remote button.
- Release the button when the opener provides its confirmation signal.
Confirmation may involve the opener light flashing, a clicking sound, or another model-specific indication.
Certain newer openers and remotes use different programming sequences.
Step 4: Test the remote control
Stand where you can see the garage door clearly.
Press the programmed remote button.
The garage door should open or close normally, provided the safety system is working.
If the remote does not work, inspect the battery, verify compatibility, and repeat the model-specific procedure.
You can find additional instructions in Chamberlain’s official remote programming guide.
How to Program a Chamberlain Garage Door Opener Keypad?
A Chamberlain garage door opener keypad is useful when you want to enter the garage without carrying a remote.
It can also help when family members need access without sharing physical remotes.
Keypad programming varies by model. Traditional wireless keypads, universal keypads, and myQ video keypads have different procedures.
For a compatible traditional wireless keypad, the general process is:
- Check that the keypad is compatible with your opener.
- Install or check the keypad battery.
- Choose a private personal identification number (PIN).
- Activate programming mode using the keypad instructions.
- Press and release the opener’s Learn button when directed.
- Complete the keypad’s specified pairing sequence.
- Test the PIN from outside the garage.
Some keypads use an Enter button to complete pairing, while others require additional steps based on the opener type.
Avoid obvious PINs such as 1234 or repeated digits. Change the PIN if you suspect that someone else knows it.
Never share your keypad code publicly or install the keypad where someone can easily observe you entering the PIN.
How to Connect a Chamberlain Garage Door Opener to myQ?
The Chamberlain myQ garage door opener system provides smart control features for compatible devices.
You can use the app to check door status and perform supported actions without standing beside the garage door.
Step 1: Check compatibility
Confirm that your Chamberlain opener supports integrated myQ connectivity.
Some older garage door openers may require a compatible external Smart Garage Control or hub.
Step 2: Download the myQ app
Install the official myQ app from your smartphone’s app store.
Create an account or sign in with your existing account.
Step 3: Check your Wi-Fi network
Most myQ Wi-Fi garage door openers require a 2.4 GHz Wi-Fi connection.
Make sure your home wireless network reaches the garage.
If your router combines 2.4 GHz and 5 GHz networks, check the router settings or use the manufacturer’s setup instructions to ensure the opener can connect.
Step 4: Add the garage door opener
Open the myQ app and start the device setup process.
Choose the appropriate opener or hub type.
The app will provide instructions for placing the device into setup mode.
Step 5: Connect the opener to Wi-Fi
Follow the on-screen instructions to connect the opener to your home wireless network.
Enter the correct Wi-Fi credentials when requested.
Depending on the model, the opener may use Bluetooth-assisted setup or a temporary device network.
Step 6: Confirm operation
After the opener appears in the app, verify the displayed garage door status.
Test supported commands while physically present and able to observe the door.
Keep people, pets, and vehicles away from the doorway during operation.
If setup fails, review the network requirements and follow Chamberlain’s Wi-Fi troubleshooting guide.
Chamberlain Garage Door Opener Troubleshooting: Common Problems and Solutions
Even a properly installed garage door opener may develop problems over time.
Remote batteries can fail, safety sensors may become misaligned, and Wi-Fi connections can disconnect.
Before calling a technician, you can safely perform several basic checks.
Problem 1: Chamberlain garage door opener not working
If the opener does not respond when you press the wall control or remote, begin with the power supply.
Check whether the outlet has power and whether a circuit breaker has tripped.
Look for visible damage to the plug or power cable.
If the outlet is working, check whether the opener shows any diagnostic lights.
Do not open electrical housings or attempt internal electrical repairs unless you are qualified to perform them.
If a wall control works but the remote does not, the problem may be related to the remote battery, programming, compatibility, or lock feature.
Problem 2: Chamberlain garage door opener remote not working
If the wall control operates the door but the remote does not, try these steps:
- Replace the remote battery with the correct type.
- Check whether the wall control’s Lock feature is enabled.
- Verify that the remote is compatible.
- Reprogram the remote using the model-specific instructions.
- Test it from a reasonable distance with a clear line of sight.
If several remotes stop working together, investigate the opener rather than assuming every remote has failed.
Problem 3: Chamberlain garage door opener won’t close
A garage door that opens normally but refuses to close may have an obstructed or misaligned safety sensor.
Inspect both sensors near the bottom of the opening.
Remove any object blocking the beam and gently clean the sensor lenses.
Look for loose brackets or damaged wiring.
Check the sensor indicator lights against the instructions in your manual.
If the opener lights flash repeatedly, the safety reversing system may be reporting a problem. However, flashing lights can have other causes, including certain wall-control settings. support.
Never defeat the sensors or force the garage door to close.
Problem 4: Chamberlain garage door opener opens but immediately reverses
If your garage door starts closing and then returns to the open position, possible causes include:
- An obstruction in the doorway
- Misaligned safety sensors
- Incorrect closing travel settings
- Door binding or mechanical resistance
- A damaged or unbalanced door
Start by checking for visible obstructions.
If the door is difficult to move manually, do not increase the opener force to compensate.
Contact a qualified garage door technician to inspect the springs, rollers, cables, tracks, and other mechanical components.
Problem 5: Chamberlain garage door opener flashing lights
Flashing lights may indicate an operating condition or fault.
On some models, the motor’s UP and DOWN arrow indicators display diagnostic codes.
For example, the number of flashes from each arrow creates a two-part code.
Count the flashes carefully and compare the pattern with the manufacturer’s diagnostic guide.
Problem 6: Chamberlain myQ garage door opener offline
If your opener appears offline in the myQ app, it may have lost connectivity.
Start by checking whether the home Wi-Fi network is working.
Then verify the following:
- Your internet service is available.
- The garage has adequate wireless signal.
- The opener is powered on.
- The router provides a compatible network.
- The myQ app is updated.
If necessary, follow Chamberlain’s official reconnection instructions.
Avoid performing a factory reset before checking simpler causes, because a full reset may remove saved device settings.
Quick troubleshooting table
| Problem | Possible cause | Recommended first action |
|---|---|---|
| Opener does not turn on | Power problem | Check outlet and breaker |
| Remote does not work | Battery or programming | Replace battery and verify pairing |
| Door will not close | Safety sensor problem | Inspect alignment and obstructions |
| Door reverses unexpectedly | Obstruction or mechanical issue | Inspect door path and seek service if needed |
| myQ shows offline | Wi-Fi connection | Check network signal and setup |
| Opener makes unusual noise | Loose or worn components | Stop operation if grinding or binding occurs |
| Door does not fully open | Travel setting or door issue | Consult manual and inspect for binding |
| Keypad does not respond | Battery or pairing issue | Check battery and model-specific instructions |
How to Reset a Chamberlain Garage Door Opener?
A Chamberlain garage door opener reset is sometimes needed when you want to remove a lost remote, resolve a programming issue, or reconnect a smart device.
However, the word reset can describe several different operations.
Resetting remote-control access
On many models, holding the Learn button for the period specified in the manual erases stored remote-control and keypad programming.
For certain models, that period is approximately six seconds, but it should not be assumed for every opener.
After clearing access, the remaining authorized remotes and keypads must be programmed again.
This can be useful if a remote has been lost or stolen.
Resetting Wi-Fi settings
If the opener has trouble connecting to myQ, you may need to clear or reconfigure its Wi-Fi connection.
Wi-Fi reset instructions differ from the remote-programming reset instructions.
Follow the manufacturer’s specific procedure so you do not accidentally remove unrelated settings.
Resetting travel settings
Travel-limit programming controls where the door stops during opening and closing.
Do not erase or change travel settings unless the manual directs you to do so.
Incorrect settings can affect the safety reversing system.
Important: Never randomly hold multiple motor-unit buttons in an attempt to reset everything. Identify the exact problem first.
How to Maintain a Chamberlain Garage Door Opener?
Regular maintenance can help reduce unexpected problems and extend the useful life of your garage door system.
The opener and the garage door should be checked together because both affect operation.
Monthly maintenance
- Inspect the garage door for obvious damage or loose parts.
- Watch and listen for unusual movement.
- Check the safety reversing sensors.
- Perform the safety reversal test described in the manual.
- Confirm that the wall control and remotes operate correctly.
- Inspect the emergency release without attempting unsafe repairs.
Periodic maintenance
Check the mounting hardware and visible cable routing.
Keep the rail and moving components clean.
Lubricate only the components recommended by the garage door and opener manufacturers, using the specified lubricant.
Do not automatically apply grease to the belt, rail, or motor assembly.
Different opener designs have different maintenance requirements.
Annual professional inspection
Consider scheduling a qualified garage door technician to inspect the door balance, springs, cables, rollers, and overall system.
A professional can identify wear that may not be obvious to homeowners.
Chamberlain also provides a recommended maintenance guide for its products.
How to Choose the Best Chamberlain Garage Door Opener?
Before buying a Chamberlain garage door opener, compare your garage requirements with the available product features.
Consider the garage location
If the garage is attached to your house, a quieter belt-drive opener may be worth considering.
For a detached garage, a chain-drive system may provide adequate performance at a lower price.
Check garage door compatibility
Measure the door’s height and inspect its design.
Standard residential garage doors are often 7 feet high, but taller doors may require a compatible extension kit.
Not every opener supports every door type or size.
Decide whether you need battery backup
Battery backup can be useful if your area experiences frequent electrical outages.
Check whether it is included in the product or sold separately.
Evaluate smart features
If you regularly want to check the garage door while away from home, consider a compatible myQ model.
Before purchasing, verify whether your preferred smart-home integrations are supported. Do not assume that every third-party system will work with myQ.
Compare accessories
Look at the included remotes, wireless keypad, wall control, lighting, and other accessories.
A cheaper opener may cost more overall if you need to buy additional components separately.
Chamberlain garage door opener buying checklist
Pre-purchase checklist
0 of 7 checkedMy garage door type and height are supportedThe drive type suits my noise preferencesThe motor and rail fit my garageI checked the included remotes and keypadI confirmed whether battery backup is includedI verified myQ and smart-home compatibilityI reviewed the warranty and installation requirements
Chamberlain Garage Door Opener vs. LiftMaster
Chamberlain and LiftMaster are associated brands within the Chamberlain Group.
Both offer garage door opener systems, but their distribution, installation approach, product lines, and warranty conditions can differ.
Chamberlain products are commonly marketed to homeowners through retail channels.
LiftMaster products are generally sold through professional dealers and installers.
| Feature | Chamberlain | LiftMaster |
|---|---|---|
| Typical buyer | Homeowner or DIY buyer | Professional installation customer |
| Retail availability | Common at major retailers | Primarily dealer network |
| Smart technology | Compatible myQ models | Compatible myQ models |
| Available drive types | Depends on product line | Depends on product line |
| Installation | DIY or professional, depending on model | Generally professional |
| Best for | Homeowners choosing retail products | Buyers wanting dealer-led installation |
Neither brand is automatically better for every garage. Product quality and value depend on the specific model and intended use.
Chamberlain Garage Door Opener Parts and Accessories
Over time, you may need replacement components for your Chamberlain garage door opener.
Common accessories and replacement parts include remotes, wireless keypads, compatible batteries, safety sensors, drive components, and other model-specific items.
Before purchasing a replacement part, identify the full model number and check compatibility.
A remote that looks identical to an older remote may use a different communication system.
Similarly, some replacement components are intended only for particular models or manufacturing periods.
Use Chamberlain’s official replacement parts directory to find supported parts.
How Much Does a Chamberlain Garage Door Opener Cost?
The cost depends on the drive type, features, motor design, accessories, and retailer.
As an illustrative U.S. budget, basic chain-drive systems may cost around $150–$250, while smart belt-drive systems commonly cost several hundred dollars. Premium configurations may cost more.
These are broad shopping estimates, not guaranteed current prices.
Installation labor, electrical work, door reinforcement, extension rails, and additional accessories may increase the total cost.
The best way to compare value is to calculate the complete installed cost rather than looking only at the product price.
Common Mistakes to Avoid When Using Chamberlain Garage Door Openers
Some garage door problems can be prevented by avoiding common mistakes.
Ignoring safety sensors: Never operate a garage door with bypassed or defective safety features.
Using the wrong remote: Always verify compatibility before attempting programming.
Adjusting motor force to overcome a faulty door: This can mask a dangerous mechanical condition.
Skipping safety tests: Check the reversal system regularly and after adjustments.
Ignoring unusual noises: Grinding, scraping, or sudden changes in movement can indicate a mechanical problem.
Sharing keypad codes: Use private access codes and change them when necessary.
Forgetting Wi-Fi requirements: Verify network compatibility before buying a smart-enabled opener.
Taking these precautions can help make day-to-day garage door operation safer and more reliable.
Frequently Asked Questions About Chamberlain Garage Door Openers
Locate the Learn button on the opener motor unit. On many compatible models, press and release the button, then press and hold the desired remote button within approximately 30 seconds. Wait for the confirmation signal and test the remote. Some Chamberlain remotes and newer security systems require different steps, so always check the model-specific programming instructions.
Common causes include a power outage, dead remote battery, activated wall-control Lock feature, misaligned safety sensors, or mechanical door problems. Start by checking the power supply and wall control. If the opener runs but the door does not move correctly, stop operation and inspect the system for visible problems. Seek professional assistance when necessary.
The Learn button is usually located on the motor unit, near the antenna wire or behind a light cover. Its color varies by model. The button is used for compatible remote and keypad programming and certain other functions. Check your owner’s manual if you cannot locate it.
First, determine whether you need to erase remote access, reset Wi-Fi, or change travel settings. These are different procedures. On many models, holding the Learn button for the specified period clears accessory programming. However, a full reset is not always necessary. Follow your model’s official instructions to avoid losing important settings.
Yes, if your opener supports myQ connectivity or works with an appropriate compatible smart garage device. After setup, the myQ app can provide supported monitoring and control features. You will need the correct equipment, a compatible network, and an active account. Available features may vary by device and region.
Beeping can indicate various operating conditions, including battery-related alerts, smart-device warnings, or other model-specific events. Some connected garage systems also provide audible warnings during remote operation. Identify the exact opener model and the beep pattern before troubleshooting. Consult its manual or Chamberlain’s support resources for the correct explanation.
Find your opener’s model number and identify the compatible replacement remote. Purchase the correct remote, install its battery if required, and follow the official pairing instructions. Test the remote from a safe position. If your old remote was lost or stolen, consider erasing previous remote programming and pairing your authorized remotes again.
Service life depends on installation quality, maintenance, daily usage, environmental conditions, and individual component wear. Some openers provide many years of operation, but no single lifespan applies to every model. Regular safety testing and professional inspections are important. Replace or repair the system when safety, reliability, or parts availability becomes a concern.
A belt-drive opener is generally quieter, making it attractive for attached garages. A chain-drive opener may offer a lower purchase price. Both can provide reliable performance when properly installed and maintained. The better choice depends on your noise preferences, budget, door compatibility, and desired features.
The problem may be caused by a weak wireless signal, incorrect password, incompatible network settings, or an interrupted setup process. Many myQ garage door openers require 2.4 GHz Wi-Fi. Verify your router configuration and follow the official myQ setup steps. If necessary, reconnect the opener without immediately erasing other settings.
Final Thoughts
A Chamberlain garage door opener can provide convenient, reliable access to your garage when the correct system is chosen and installed properly.
Belt-drive models are useful for homeowners who prefer quieter operation. Chain-drive openers remain a practical choice for many standard garages, while compatible wall-mounted systems can free up valuable overhead space.
Understanding how to program your Chamberlain garage door opener remote, configure the keypad, connect myQ, and troubleshoot common problems can help reduce interruptions and unnecessary repair expenses.
Above all, keep the safety sensors working, test the reversal system regularly, and consult a qualified technician whenever the garage door develops a mechanical or safety problem.
For manuals, replacement parts, compatibility information, and model-specific troubleshooting, visit Chamberlain’s official support center.




Leave a Reply
You must be logged in to post a comment.