Content Attributes
An insulated chicken coop is one of the best upgrades you can make if you keep chickens in a cold, windy, or damp climate. It helps your flock stay more comfortable in winter, reduces drafts, supports egg production, and can make daily coop care easier. But the truth is simple: insulation alone is not enough. Chickens need a coop that is dry, secure, draft-protected, and still properly ventilated. Many university extension sources stress that moisture control and airflow are just as important as warmth, because damp air and ammonia buildup can hurt birds even when a coop seems “warm.”
If you are searching for an insulated chicken coop for sale, comparing the best insulated chicken coop models, or looking for insulated chicken coop plans, this guide brings everything together in one place. It is written for beginners and practical backyard keepers who want a setup that works in real weather, not just in product photos.
Why an insulated chicken coop matters?
A good insulated coop helps keep indoor temperatures steadier. That does not mean it turns the coop into a heated room. Instead, it slows heat loss, reduces wind penetration, and helps the flock’s own body heat work better inside the structure. In hot weather, insulation can also reduce heat gain from direct sun, so it is useful in more than one season. Current buying guides and poultry-care sources both point to the same idea: insulation works best when paired with weather protection, tight construction, and airflow placed above roost level.
Here is why many owners prefer an insulated chicken coop:
- It helps block cold wind.
- It reduces sudden temperature swings.
- It helps keep bedding drier when the coop is well ventilated.
- It can support better winter comfort for hens.
- It may reduce stress during harsh weather.
- It can also help in summer by slowing heat transfer through walls and roof.
Still, many chickens tolerate cold well when they are dry and sheltered. The biggest winter problem is often not low temperature by itself, but wet litter, poor ventilation, and drafts blowing directly over roosting birds. That is why the best insulated chicken coop is not simply the thickest one. It is the one that balances insulation, airflow, dryness, predator safety, and enough room for the flock.
What current Google results show about search intent?
When you analyze the current results for this keyword, the search intent is mixed. Some pages focus on winter chicken care and insulation tips. Others target buyers looking for a ready-made coop. Some results offer DIY builds or insulated chicken coop plans. A smaller group focuses on comparisons and “best” product roundups. That means a strong article for this keyword needs to answer all four questions:
- What is an insulated chicken coop?
- How do I winter-proof one correctly?
- Should I buy or build one?
- What features make it the best insulated chicken coop?
That pattern is visible in current result types, including extension winter-care pages, buyer guides, DIY content, and listings for insulated models or plans.
Because of that mixed intent, the best article structure is not just a definition post. It needs to include practical winter setup steps, product-selection advice, and basic planning guidance for people who want to build. That is what the rest of this guide does.
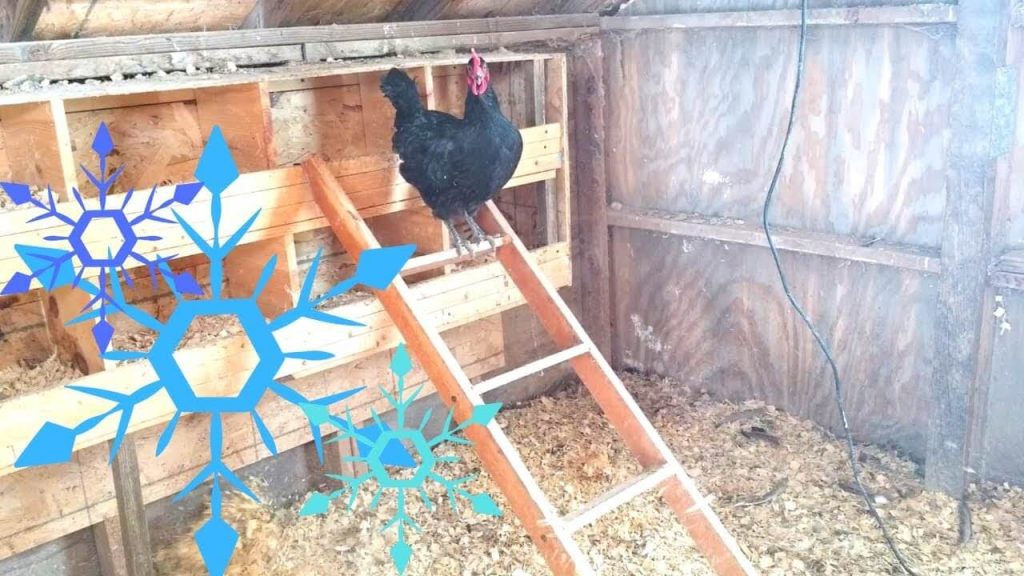
Step 1: Choose the right coop size and layout first
Before you think about foam board, wall panels, or deep bedding, start with size. A cramped coop gets dirty faster, traps moisture more easily, and creates stress in the flock. An oversized coop can still work well, but it may hold less body heat in severe cold if it is drafty and poorly designed. A smart middle ground is best.
Look for these layout basics in an insulated chicken coop:
- Enough interior floor space for your flock
- Roost bars placed away from drafts
- Nest boxes that stay dry and easy to access
- Vent openings high up, not blowing directly at birds
- A roof that does not leak
- Easy cleaning access
- Safe predator-proof openings and latches
Many winter-care sources emphasize that dry housing and proper ventilation matter more than extreme heating. A properly sized coop helps you manage both. When hens roost at night, warm moist air rises. If your ventilation is placed high and the structure is not leaky at bird level, you can remove moisture without chilling the flock.
A strong layout usually includes an elevated or dry base, insulated roof area, and vents near the top of the walls or ridge. The roof deserves special attention because heat loss often happens there first. If you are comparing an insulated chicken coop for sale, the roof and floor construction often tell you more than the marketing headline does.
Step 2: Focus on insulation, but never block ventilation
This is the biggest mistake beginners make. They hear “insulated chicken coop for winter” and then seal the coop too tightly. That can create damp air, condensation, frost, ammonia smell, and breathing problems. Extension recommendations are very consistent here: chickens need ventilation year-round, especially in winter, because respiration and droppings add moisture to the air.
A better approach is:
- Insulate walls and roof
- Seal cracks that cause drafts at bird level
- Leave or create protected high vents
- Keep litter dry
- Prevent roof leaks
- Avoid trapping humidity inside
Good insulation materials can include rigid foam board, insulated wall cavities, or reflective insulation used safely and covered so birds cannot peck it. Some sellers and DIY builders also use straw bales outside the coop as temporary wind barriers, not as the only wall system. Search results and winter setup examples show that straw-bale wind blocking is common, especially around exposed sides.
The goal is not “airtight.” The goal is “draft resistant but breathable.” That difference matters. You should not feel cold air blowing across the birds while they sleep, but you should still allow moist air to escape above them. Illinois Extension notes that doors and windows should fit tightly, drafts should be fixed, and insulation in roof and walls can help birds stay warm.
Step 3: Build a winter-ready floor, bedding, and moisture system
The floor of an insulated chicken coop does more work than many people realize. If the base is cold, wet, or poorly protected from ground moisture, the whole coop becomes harder to manage. That is why raised floors, dry foundations, and thick bedding all matter.
Several extension sources recommend deep dry bedding in winter. A thicker bedding layer helps insulate feet, improves comfort, and supports a drier environment when managed well. Guidance commonly mentions around 6 to 12 inches of bedding, though the exact depth depends on your climate, coop design, and cleaning style.
For a better winter setup:
- Raise the coop off wet ground when possible
- Keep waterers from spilling into bedding
- Use clean, dry bedding such as pine shavings
- Turn or refresh litter as needed
- Watch for ammonia smell
- Remove wet patches quickly
If you are following insulated chicken coop plans, do not spend all your effort on the walls and forget the base. Cold air often moves under lightweight prefab coops. A raised floor can help with drainage and predator control, but it may also need better floor insulation in severe climates. That is one reason the best insulated chicken coop designs treat floor, walls, and roof as one system.
Moisture control is not optional. Wet litter raises humidity, increases ammonia, and can contribute to respiratory stress. Wisconsin and Alabama poultry guidance both stress that moisture control is essential during cold weather.
Step 4: Pick the best insulated chicken coop features before buying
If you want an insulated chicken coop for sale, do not choose based only on appearance. Many attractive coops are too small, too light, or too open for real winter conditions. Product pages and buying guides often highlight insulation, but you still need to inspect the full feature set.
Here is what to look for when shopping:
Must-have features
- Solid weatherproof roof
- Ventilation openings high in the coop
- Dry nesting area
- Strong latches and predator protection
- Easy-clean tray or access doors
- Materials thick enough for real outdoor use
- Raised floor or good moisture barrier
- Protected insulation that birds cannot peck
Nice-to-have features
- Removable droppings tray
- Multiple access doors
- Expandable run
- Window covers or storm panels
- Heavy-duty roofing material
- Reinforced framing
- Auto door compatibility
A quality coop should also be realistic about flock size. Some retail listings claim a coop holds more birds than it truly can. If the structure looks very compact, assume the lower number is safer, especially in winter when birds spend more time inside. Current marketplace results show many “insulated” coops that are still fairly small or lightweight, which means buyers should be cautious with marketing claims.
When reading reviews or product descriptions, check whether insulation is in the walls only, or also the roof. Ask whether vents can stay open in winter without creating a direct draft. A beautiful coop that leaks, sweats, or traps damp air is not the best insulated chicken coop, even if it looks premium.
Step 5: Use smart insulated chicken coop plans if you want to build one
DIY can be an excellent option if you want more space, better materials, and a setup matched to your weather. Many people search for insulated chicken coop plans because commercial coops often cost more while offering less space and lighter construction. Current search results show continued interest in PDF plans, free plans, and custom builds designed for winter use.
A simple plan should include:
- A sloped waterproof roof
- Wall cavities for insulation
- High vents with hardware cloth
- Dry accessible nest boxes
- Proper roost spacing
- Easy cleaning doors
- Strong framing
- Safe predator-proof run connection
For most backyard keepers, 2×4 framing is a practical choice because it gives you enough depth to insulate walls properly. Cover interior insulation so birds cannot peck exposed foam or loose materials. Also plan for maintenance access from the beginning. If cleaning is difficult, bedding will stay wet longer and the coop will perform worse.
A smart DIY builder also designs for seasons, not only winter. Good insulation can help keep summer temperatures more stable too. Buying guides and poultry sources alike note that insulation is not only about cold weather; it also helps reduce heat transfer in hot conditions when paired with ventilation.
If you are using insulated chicken coop plans, keep these build priorities in order:
- Dry shell
- Draft control
- Ventilation
- Predator safety
- Easy cleaning
- Insulation layers
- Winter water and bedding management
That order keeps the project practical. A coop that is heavily insulated but hard to clean or easy for predators to enter is not a successful design.
Image suggestion for this section: DIY framing plan with labeled wall cavity insulation, roof slope, vents, and nest box placement.
Step 6: Prepare an insulated chicken coop for winter the right way
An insulated chicken coop for winter should be prepared before the first cold snap arrives. Waiting until snow, freezing rain, or high winds begin usually leads to rushed fixes.
Use this winter checklist:
- Inspect roof for leaks
- Seal small drafts around joints and openings
- Keep high vents open and protected
- Add or refresh deep dry bedding
- Check doors and latches
- Make sure water stays available
- Keep nesting areas dry
- Watch flock behavior at night
- Remove wet litter and manure buildup
- Confirm predator protection
University guidance also reminds owners to keep fresh water available and manage manure and moisture inside the coop. Cracked eggs should be collected quickly in freezing weather. Some sources suggest supplemental heat only at low temperature thresholds or special conditions, but that depends on breed, age, health, and local climate.
For most backyard flocks, the first winter upgrades should be:
- better wind protection,
- better bedding,
- better water management,
- and better ventilation placement.
A heat lamp is often the first thing beginners think about, but it should not be the first fix. Fire safety matters, and many flocks do fine without added heat when the coop is dry, draft-free, and well designed. Search results and extension guidance repeatedly place shelter, ventilation, and dryness ahead of casual heating.
How to choose the best insulated chicken coop for your climate?
The best insulated chicken coop for a mild winter area may not be the best one for a snowy or windy region. Climate should guide your choice.
Mild winter climate
Choose a coop with:
- good wind blocking,
- moderate insulation,
- raised floor,
- top ventilation,
- and dry bedding management.
Cold and snowy climate
Choose a coop with:
- insulated roof and walls,
- stronger framing,
- better weatherproofing,
- snow-shedding roof pitch,
- dry floor protection,
- and easy winter access.
Wet and windy climate
Choose a coop with:
- excellent roof and wall sealing,
- strong ventilation above bird height,
- moisture-resistant materials,
- protected run panels,
- and no low-level drafts.
A lot of winter success comes down to weather exposure, not just temperature. Wind-driven moisture can make a weak coop fail fast. That is why sturdy construction and proper placement matter. Put the coop on well-drained ground, face openings away from strong prevailing wind if possible, and protect the run with seasonal windbreaks where needed.
Common mistakes to avoid
Many owners buy or build an insulated chicken coop but still struggle in winter because of a few avoidable errors.
Mistake 1: Sealing the coop too tightly
This traps moisture and ammonia.
Mistake 2: Ignoring roof insulation
Warm air rises, so the roof often matters most.
Mistake 3: Trusting unrealistic flock-size claims
Small prefab coops are often over-marketed.
Mistake 4: Letting bedding stay damp
Wet litter quickly ruins the indoor environment.
Mistake 5: Depending only on heat
A badly designed heated coop is still a bad coop.
Mistake 6: Exposing insulation to pecking
Cover foam and similar materials safely.
Mistake 7: Buying only for looks
The best insulated chicken coop is judged by performance, not style.
Is an insulated chicken coop worth it?
For many keepers, yes. An insulated chicken coop is especially worth it if you live in a cold, windy, or variable climate, or if you want a more stable year-round structure. It can lower flock stress, improve daily winter management, and make the coop more comfortable in both winter and summer. But its value depends on design quality. Insulation without ventilation is not a win. Insulation without weatherproofing is not a win either. The best results come from a balanced system backed by poultry-care basics supported by extension guidance: dry coop, controlled drafts, steady airflow, clean bedding, and reliable water.
So whether you are shopping for an insulated chicken coop for sale, studying insulated chicken coop plans, or narrowing down the best insulated chicken coop for your yard, keep one rule in mind: build or buy for real winter conditions, not marketing words.
FAQs
The best insulated chicken coop for winter has insulated walls and roof, high ventilation, dry bedding, strong predator protection, and a leak-proof shell. It should be draft resistant but not airtight.
Not always, but an insulated chicken coop can help in colder climates by reducing heat loss and improving comfort. Chickens still need ventilation and dry conditions even when insulation is added.
Yes. Current results include marketplace listings, buyer guides, and retail pages. Still, compare dimensions, ventilation, and materials carefully because many models are smaller or lighter than they appear.
They can be, especially if you want stronger framing, more space, and climate-specific design. DIY plans let you control insulation depth, roof slope, vent placement, and cleaning access.
Sometimes, but not by default. Many flocks do well in a dry, draft-free, well-ventilated coop without extra heat. Heating decisions depend on temperature, breed, health, age, and safety considerations.
Conclusion
An insulated chicken coop is one of the smartest long-term improvements for backyard poultry keepers who face cold weather, damp wind, or temperature swings. The best setup is not just warm. It is dry, clean, safe, and ventilated. That is the real difference between a coop that only looks winter-ready and one that actually protects your flock.


Leave a Reply
You must be logged in to post a comment.