Content Attributes
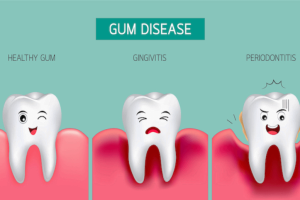
Living with knee arthritis can feel limiting. But the right movement can help. Gentle, regular exercise reduces pain. It improves joint motion & builds strength to support your knees. It also boosts confidence. This guide gives you the Top 11 Best home exercises for knee arthritis pain relief. Each exercise is simple. You can do them at home. No fancy gear is needed. Just patience and consistency.
Before you start, warm up. Walk around the room for 3–5 minutes. Swing your arms. Breathe slowly. Listen to your body. Mild muscle effort is okay. Sharp joint pain is not. If pain spikes, ease off. Try a smaller range. Or skip the move for today.
Quick safety checklist
- Ask your doctor if you have heart, lung, or balance issues.
- Move slowly. Avoid fast, jerky motions.
- Keep pain in the “mild” zone. A 0–10 scale of 0–3 is usually okay.
- Use support. Hold a chair, wall, or counter if needed.
- Breathe evenly. Do not hold your breath.
- Stop if you feel dizziness, chest pain, or swelling.
- Ice after if the knee feels hot or puffy.
1) Quad Sets (Thigh Muscle Activation)
Quad sets wake up the front thigh. Strong quads support the knee. They reduce strain on sore joint surfaces. This move is done lying or sitting. It is low impact and easy to learn.
How to do it
- Lie on your back. Or sit with legs straight.
- Place a small towel under the knee.
- Gently press the back of your knee down.
- Tighten the front thigh. Hold 5–10 seconds.
- Relax for 5–10 seconds.
- Repeat 10–15 times per leg. Do 2–3 sets.
Tips
- Keep the leg straight. Do not lift the heel.
- Think “knee to the floor.”
- Keep your hips relaxed.
- Breathe out as you press.
- Stop if you feel sharp pain under the kneecap.
Why it helps
- Activates the quad after rest or swelling.
- Builds endurance for daily tasks.
- Prepares you for standing exercises.
- A great first exercise on bad pain days.
2) Straight Leg Raise (SLR)
SLR strengthens the hip flexors and quads. It supports the kneecap. It stabilizes the whole leg. You can do it on the bed or mat.
How to do it
- Lie on your back. Bend one knee, foot flat.
- Keep the other leg straight.
- Tighten the thigh of the straight leg.
- Lift it 12–18 inches.
- Hold 2–3 seconds. Lower slowly.
- Do 10–12 reps. Perform 2–3 sets per leg.
Tips
- Keep your lower back relaxed.
- Do not swing the leg. Move with control.
- If the knee hurts, reduce the height.
- Add an ankle weight later if it feels easy.
Why it helps
- Strengthens the front thigh without bending the knee.
- Useful during flares or stiffness.
- Builds support for walking, stairs, and standing.
3) Seated Knee Extension (Short Arc or Long Arc)
This move targets the quad in a pain-friendly way. You can do it at the edge of a chair. Or use a rolled towel under the knee for a short arc.
How to do it (long arc)
- Sit tall at the chair edge.
- Straighten one knee until the leg is almost straight.
- Hold 2–3 seconds at the top.
- Lower slowly.
- Do 10–15 reps. Complete 2–3 sets per leg.
Short arc option
- Lie down. Place a rolled towel under the knee.
- Straighten the leg by lifting the heel.
- Hold 2–3 seconds. Lower slowly.
- Repeat 10–15 reps. Do 2–3 sets.
Tips
- Keep movements smooth.
- Avoid locking the knee hard.
- If the kneecap feels sore, shorten the range.
- Add light ankle weights only when pain is calm.
Why it helps
- Builds quad strength for sit-to-stand.
- Eases stair work and chair rising.
- Supports kneecap tracking.
4) Heel Slides (Knee Flexion Mobility)
Heel slides improve bending. They reduce stiffness and help lubrication. This is a gentle motion drill.
How to do it
- Lie on your back. Legs straight.
- Slide one heel toward your buttocks.
- Bend the knee as comfort allows.
- Hold 2–3 seconds. Slide back slowly.
- Do 10–15 reps each side. Perform 2–3 sets.
Chair option
- Sit tall. Slide the foot back under the chair.
- Hold 2–3 seconds. Return slowly.
- Repeat for 10–15 reps.
Tips
- Use a towel under the heel for easy sliding.
- Add a strap to assist the last few degrees.
- Stop before sharp pain.
- Try after a warm shower for easier motion.
Why it helps
- Restores bending needed for sitting and stairs.
- Loosens the joint capsule.
- Prepares the knee for more loaded moves.
5) Calf Raises (Ankle Pump for Knee Support)
Strong calves support your gait. They help absorb ground forces. They also reduce strain on the knee. Calf raises are simple and effective.
How to do it
- Stand behind a chair or counter.
- Feet hip-width apart.
- Rise up onto your toes.
- Hold 2 seconds at the top.
- Lower slowly to the floor.
- Do 10–15 reps. Complete 2–3 sets.
Progressions
- Single-leg raises for advanced users.
- Add a small backpack weight later.
- Try on a step for a larger range.
Tips
- Keep knees soft. Do not lock them.
- Go slow to build control.
- Balance is key. Use your support.
Why it helps
- Improves push-off during walking.
- Supports knee alignment.
- Reduces fatigue and soreness in daily life.
6) Mini Squats (Pain-Smart Strength)
Mini squats build leg strength with less knee bend. They load the hips and thighs together. They teach good mechanics for daily tasks.
How to do it
- Stand with feet hip-width. Hold a counter.
- Push hips back slightly.
- Bend knees a little (about 30–45°).
- Keep heels down. Chest tall.
- Hold 1–2 seconds. Stand up slowly.
- Perform 8–12 reps. Do 2–3 sets.
Tips
- Keep knees tracking over middle toes.
- Do not let knees cave inward.
- Stop before sharp pain.
- Start shallow. Increase depth gradually.
Why it helps
- Trains safe sit-to-stand movement.
- Builds quad and glute strength.
- Improves confidence with bending tasks.
7) Sit-to-Stand from a Chair (Functional Power)
This is a real-life strength builder. It trains the exact motion you use daily. It boosts independence and knee control.
How to do it
- Sit at the front of a sturdy chair.
- Feet under knees. Slightly wider than hips.
- Lean forward a bit.
- Press through heels. Stand tall.
- Slowly sit back with control.
- Do 8–12 reps. Complete 2–3 sets.
Make it easier
- Use a higher chair or add cushions.
- Hold a counter for balance.
- Use armrests if needed at first.
Make it harder
- Cross your arms over your chest.
- Pause halfway down for 2 seconds.
- Lower the seat height.
Why it helps
- Builds strength for daily activities.
- Trains hips and thighs to share load.
- Reduces pressure on irritated knee tissue.
8) Step-Ups (Low Step)
Step-ups prepare you for stairs. They strengthen quads and glutes. They also improve balance and knee control.
How to do it
- Use a low step (2–4 inches to start).
- Place one foot fully on the step.
- Press through the heel.
- Step up and bring the other foot next to it.
- Step down with control.
- Do 8–10 reps per side. Perform 2–3 sets.
Tips
- Keep your knee aligned over the middle toes.
- Avoid collapsing inward.
- Use a railing or counter for support.
- Start low. Increase step height slowly.
Why it helps
- Builds stair confidence.
- Trains hip-knee alignment.
- Improves walking endurance.
9) Clamshells (Hip Stabilizer)
Weak hip muscles can stress the knee. Clamshells target the outer hip. They improve alignment and control.
How to do it
- Lie on your side. Knees bent. Hips stacked.
- Keep feet together.
- Lift the top knee like opening a clamshell.
- Do not roll your hips back.
- Hold 2 seconds. Lower slowly.
- Do 12–15 reps. Complete 2–3 sets per side.
Tips
- Place a hand on your top hip to prevent rolling.
- Move slowly. Feel the side-hip burn.
- Add a mini band above the knees later.
Why it helps
- Strengthens hip abductors.
- Reduces knee valgus (inward collapse).
- Supports pain-free walking and squats.
10) Standing Hamstring Curls
Hamstrings support the back of the knee. Balanced strength reduces pain. This move is simple and joint-friendly.
How to do it
- Stand holding a chair or counter.
- Keep knees side by side.
- Bend one knee. Bring the heel toward your buttocks.
- Hold 1–2 seconds. Lower slowly.
- Do 12–15 reps. Perform 2–3 sets per leg.
Tips
- Keep thighs aligned. Do not let the knee drift forward.
- Avoid arching your low back.
- Add a light ankle weight when it feels easy.
Why it helps
- Builds back-of-knee support.
- Balances quad strength.
- Helps with stairs and standing tasks.
11) Heel-to-Toe Walking (Balance + Gait)
Good gait protects your knees. Heel-to-toe walking trains foot roll-through. It builds lower-leg control and balance.
How to do it
- Stand tall near a counter or wall.
- Step forward landing on the heel.
- Roll through the foot to the toes.
- Push off gently into the next step.
- Walk 30–60 seconds. Rest. Repeat 2–3 times.
Progressions
- Try a slow, controlled pace.
- Add light arm swings.
- Practice backward heel-to-toe only if safe.
Tips
- Keep steps small and steady.
- Use support if you feel wobbly.
- Stop if pain spikes or balance feels unsafe.
Why it helps
- Improves walking efficiency.
- Trains smooth push-off.
- Reduces jolts to the knee.
Gentle Mobility Add-On (Optional)
These are optional, feel-good moves. Use them to reduce stiffness. Do them daily.
- Ankle pumps: 20–30 reps each side.
- Knee pendulums in sitting: Rock knees side to side for 30–60 seconds.
- Hamstring stretch with strap: 20–30 seconds, 2–3 times per side. Keep knee slightly soft.
Weekly plan for beginners
You can rotate strength, mobility, and balance. Keep sessions short. Be consistent.
Day 1 – Strength A (20–25 minutes)
- Warm-up walk: 3–5 minutes.
- Quad sets: 2×12.
- Straight leg raises: 2×10 per side.
- Seated knee extensions: 2×12 per side.
- Calf raises: 2×12.
- Gentle mobility add-on.
2nd Day – Mobility + Balance (15–20 minutes)
- Warm-up walk: 3 minutes.
- Heel slides: 2×12 per side.
- Heel-to-toe walking: 3×45 seconds.
- Optional hamstring stretch: 2×25 seconds per side.
Day 3 – Strength B (20–25 minutes)
- Warm-up walk: 3–5 minutes.
- Mini squats: 2×10.
- Sit-to-stand: 2×8–10.
- Step-ups (low): 2×8–10 per side.
- Standing hamstring curls: 2×12 per side.
- Gentle mobility add-on.
Day 4 – Rest or light movement
- Easy walk.
- Simple stretches.
- Listen to your knees.
Repeat the cycle. Take rest days when needed. Progress slowly.
How to progress safely?
- Reps: Add 1–2 reps when exercises feel easy.
- Sets: Move from 2 to 3 sets as comfort grows.
- Range: Bend a little deeper if pain stays mild.
- Speed: Slow, controlled motions build strength.
- Load: Add ankle weights or a backpack only when pain is calm.
- Balance: Reduce chair support as you get steadier.
Green light signs
- Mild muscle burn that fades after exercise.
- Knee feels “warm” but not hot or swollen.
- Next-day soreness that is mild and short.
Red flags
- Sharp joint pain that lingers.
- Significant swelling or warmth.
- Night pain that wakes you up.
- Giving way or severe stiffness.
If these occur, scale back. Or pause and contact a clinician.
Daily living tips to protect your knees
- Pace your steps. Break long tasks into chunks.
- Use both legs. Share the load evenly.
- Choose soft shoes. Cushion helps reduce impact.
- Mind alignment. Knees follow the middle toes.
- Keep moving. Gentle motion reduces stiffness.
- Manage weight if advised. Even small changes help the joint.
- Use heat before, ice after. Heat loosens. Ice calms.
Frequently asked questions
Most people do well with 3–5 days per week. Strength work can be split into A/B days. Mobility can be done daily in short bursts. Balance can be added 2–3 times per week. Start low. Build up as your knees allow.
Use ice for 10–15 minutes. Rest the joint. Elevate the leg. Reduce reps next session. Keep your range smaller for a few days. If swelling persists, check with a professional.
Yes, when done shallow and controlled. Keep knees tracking over the toes. Stop before sharp pain. Over time, the depth can increase slightly. Pain should guide the range.
Yes. Walking is joint-friendly for many people. Choose softer surfaces. Wear cushioned shoes. Start with 10–15 minutes. Add 2–5 minutes every few days if pain stays mild.
No, but manage them wisely. Use a railing. Go slowly. Step-ups help prepare you. If pain flares, limit trips. Batch tasks to reduce stair counts.
Not at first. A chair, a low step, and a towel are enough. Later, you can add ankle weights or a mini band. Progress only when your knees feel ready.
Alternate sides. Keep reps balanced. Take longer rests between sets. Use more support. Keep ranges small until pain calms.
Gentle styles may help. Choose classes that allow modifications. Avoid deep knee bends and fast transitions. Let the teacher know about your knees.
Some people feel easier movement in 2–3 weeks. Strength changes often appear in 4–8 weeks. Progress is gradual. Consistency matters more than intensity.
A soft sleeve may give warmth and feedback. It can boost confidence. It will not fix arthritis. But it may help you move more comfortably.
Putting it all together
The Top 11 Best home exercises for knee arthritis pain relief are simple. They are friendly to sore joints. They build support around your knee. Start with quad sets, heel slides, and seated extensions. Add calf raises and clamshells. Layer in mini squats, sit-to-stand, step-ups, hamstring curls, SLRs, and heel-to-toe walking. Do them steadily. Keep effort gentle. Respect pain signals. Track your progress. Celebrate small wins.
Your knees can feel better with smart movement. Strength plus mobility makes daily life easier. Balance work adds safety. The plan above gives you a clear path. Adjust the pace to your needs. Talk to a clinician if you have concerns. You are not fragile. You are adaptable. Move with care. Move with confidence. And keep going—one easy session at a time.